Monday, April 29, 2013

BURRITO BOWLS!!


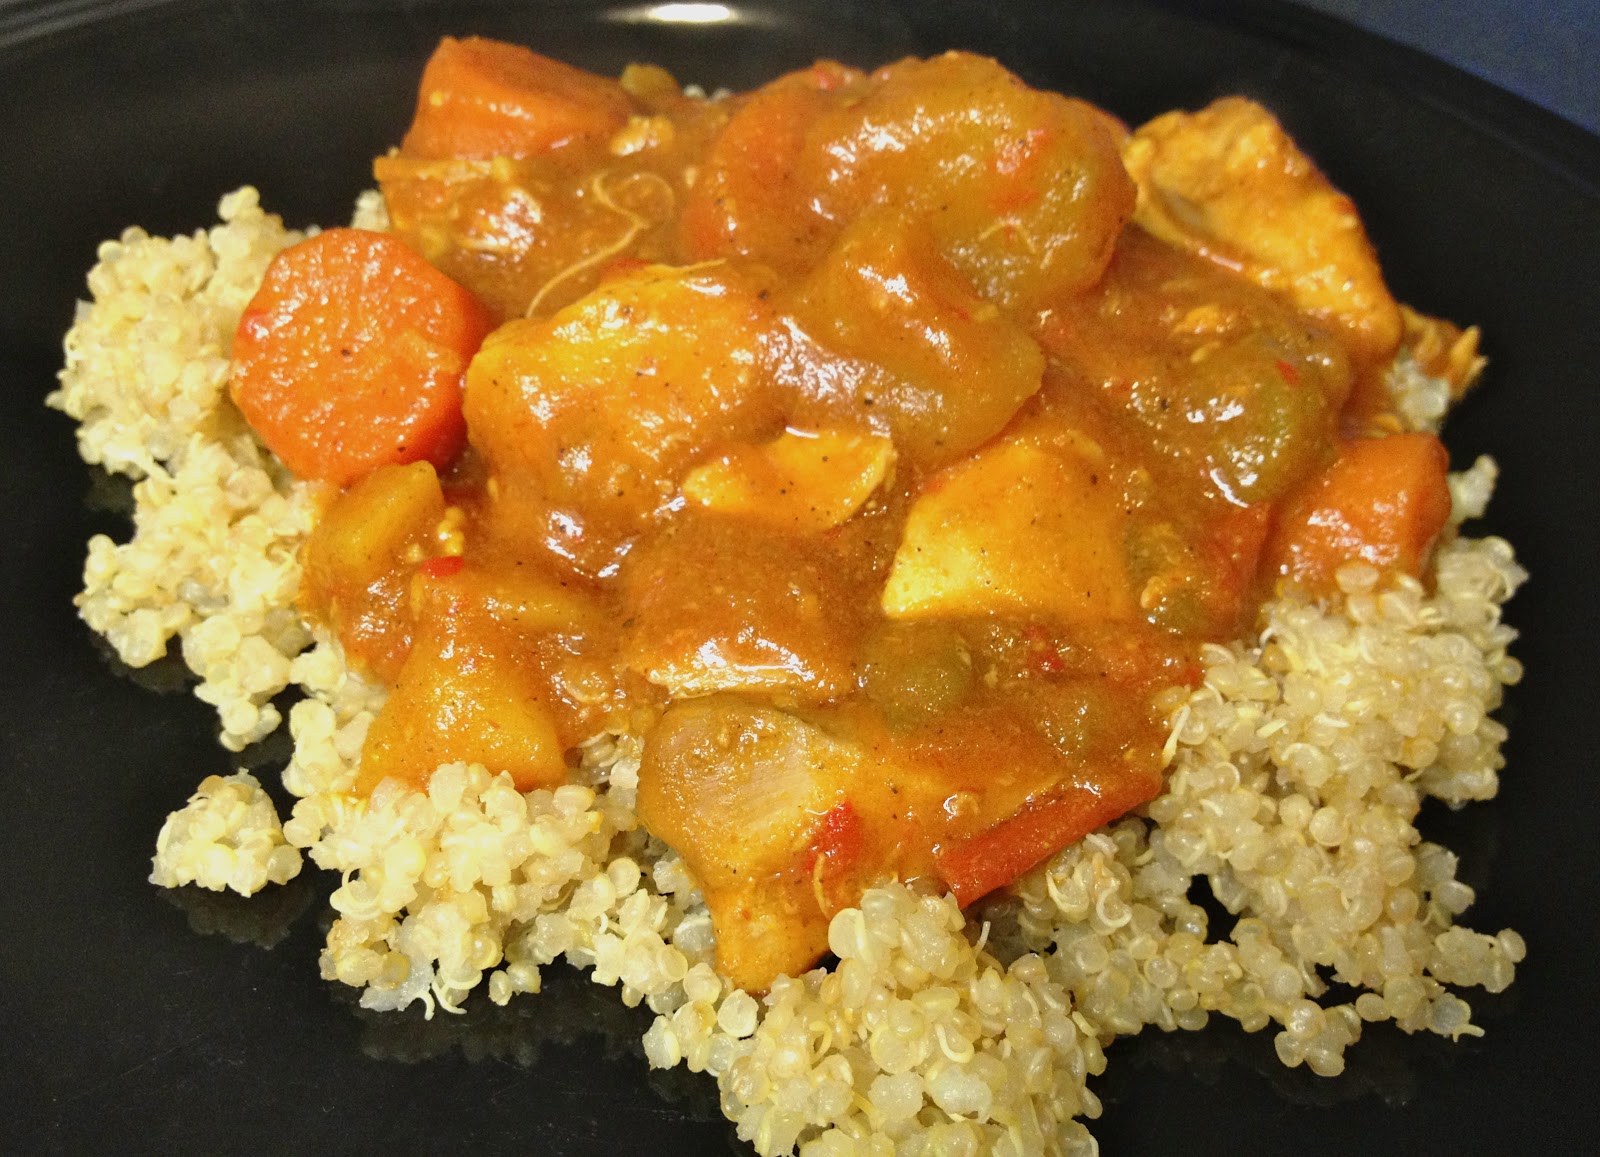
    There's less than two weeks left of school and I'm pinching pennies trying to work with the random cans and boxes I have in the cabinets to avoid buying things. I had cans of beans, corn and green chilies, tons of brown rice, some chicken and cheese in the fridge, and my first thought: BURRITO BOWLS!!!! What better to do than pile it all in one heaping stack of hot Mexican goodness, seasoned with taco flavoring, smothered in spicy salsa, creamy guacamole and topped with a big spoon of sour cream?!


       Such little preparation needed, and it was delicious, and healthy too! Brown rice is a whole grain rich in fiber and antioxidants. Black beans provide 8 grams of protein and 7.5 grams fiber per half cup plus they're full of antioxidant compounds that have been shown to improve brain function (perfect for finals! and they're cheap!) The salsa is loaded with vegetables, the corn is just good and sweet, and I've already said multiple times all the great things about avocados. Topped with some crunchy lettuce, this is a filling, satisfying and delicious dish for any budget cook! 


        I had leftover ingredients at the end of the meal so I threw it all into a bowl and stuck it in the fridge. By some miraculous way, it seemingly tasted even better leftover - maybe because the flavors had time to set, but it was so delicious! This is one of the simplest meals I've made and I was beyond satisfied. It's definitely going on my go-to list for monthly meals!


Lay all the ingredients out like a smorgasbord and pile it up however you'd like! 


Burrito Bowls
3-4 big servings
Ingredients:
1-1 1/2 large chicken breasts*
1 tbsp taco seasoning
4/5 cups cooked brown rice
1 can black beans
1 can corn
2 tbsp chopped green chilies (or jalapenos)
1 avocado
1/2 tsp cumin
2 tsp lemon juice
1/2 tsp garlic powder
1/2 tsp onion powder
pinch salt
1 cup salsa
sour cream for topping 
Shredded cheddar cheese for topping 
Lettuce for topping, shredded

Directions:
Cut chicken into thirds, place in a large pot, cover with water and bring to a slow simmer over stove for about 10 minutes or until no longer pink in the middle. Do not bring to rapid boil because chicken will get tough. Shred with two forks and mix with taco seasoning. Set aside. (If it seems a little dry add a tbsp or so of water or chicken broth.)
Drain and rinse black beans with hot water and set aside.
Cut avocado and remove pit, scoop out insides and mash with lemon juice, cumin, garlic powder and salt and set aside.
Drain can of corn and mix with chopped green chilies.
On plate, layer rice, beans, salsa, corn, avocado, chicken, cheese and sour cream. Season with salt and pepper.


**If you want to make it even cheaper, try skipping out on the chicken and mix the taco seasoning with the rice instead. Add a little extra beans (maybe a few different kinds!) to make up for the lack of meat, and with all the toppings and flavors, it will still be delicious!


Saturday, April 27, 2013

Spicy Beef and Noodle Stir Fry - With Whole Wheat Noodles!


       So I've been on an Asian food kick lately - like mimic take out meals (stay tuned for a pork fried rice recipe coming soon!) and this beef and noodle stir fry really hit the spot. It's spicy and delicious... I'm seriously in love with the sesame flavor; it's the reason I made this dish so soon after my sesame chicken recipe. Not to mention that it was cheap and totally simple. It all came together in 20 minutes, probably the same time it would take to hop in my car and head down to the nearest chinese place, and it tastes (and looks) just like the real thing.....


         It's obviously healthier than takeout because let's be honest, who knows what the hell they put in their food (No MSG in my cooking that's for sure!). I also use whole wheat noodles, and with the spicy flavorful sauce, you'd have no idea. You have the option of really giving this dish a spicy kick with more red pepper flakes, or keeping it mild and highlighting the toasted sesame flavor - either way it's soooo good and a perfect way to fix those take-out cravings.

       This recipe would also work wonderfully with broccoli, snow peas, carrots, larger julienned peppers, baby corn or even asparagus! (etc, etc) I used green beans because I hadn't cooked them in a while and was looking to change it up, and they paired really well with the flavors. I'm definitely going to start working more with stir frys and dishes like this because they are so quick to prepare, they are wicked cheap and I can use really any vegetables I have available. If that doesn't scream college cooking then I don't know what does!


I'll take another heaping plate of these noodles, please!


Spicy Sesame Beef and Noodle Stir Fry
Ingredients:
10 oz whole wheat noodles
3/4-1 lb flank steak (or any stir fry steak)
1 tbsp olive oil
1 tbsp sesame oil
1 tbsp minced garlic
1/2 tsp ginger powder
2 big handfuls green beans
1/3 cup red bell pepper, diced small
1 small onion, chopped
1/2 cup chicken broth
3 tbsp reduce sodium soy sauce
1 tbsp hoisin sauce
1/4-1/2 tsp red pepper flakes
2 tsp cornstarch
black pepper

Directions:
Cook noodles until al dente, according to package directions and drain. Season steak with ginger. Heat olive oil and half of sesame oil over medium-high heat in large pan. Add garlic and stir, for about a minute then add steak and cook until just almost cooked through, remove and transfer to a plate. No need to drain the juices, leave them in the pan. Add remaining sesame oil to the pan and let it get hot, then add green beans, onion and bell pepper, cook for a few minutes, stirring occasionally. (To get the green beans really tender you can add a tbsp of water and cover the pan for 2-3 minutes.) Wisk the broth, soy sauce, hoisin sauce, red pepper flakes and cornstarch in small bowl. Add to the vegetables in the pan along with the steak. Cook for a few minutes to let the sauce thicken. Add noodles back to the pan and toss to coat. Season with pepper and serve.


Thursday, April 25, 2013

Simple Breakfast Burritos


     As I've said before, eggs are cheap which makes them a staple in a college kids diet. I am always working with them for different meals of the day whether it be a breakfast pizza, a sandwich, a quiche (recipe coming soon) an omelette, etc etc. One thing I hadn't done this year, and I have no clue why, is a breakfast burrito. You can incorporate lots of flavors and veggies, it's simple, cheap and a great idea for dinner when the cupboards are bare and your wallet is empty - which seems to happen often towards the end of the year. Broke or not, eating one of these for dinner definitely won't make you feel like you're starving.


         This is just an idea for a recipe, but really you can put basically anything in one of these. 
Sausages, bacon, mushroom, onions, spinach, peppers, ham, cheese, tomatoes, only egg whites, olives, jalapenos, asparagus, broccoli, beans...the list goes on and on. Really it's a great meal because you can use whatever you have available. 

           Make it healthier by stuffing it all in a whole wheat, multi-grain, or corn tortilla (I didn't know, but after looking it up, corn tortillas actually count as a whole grain - they contain less calories and have antioxidants, so its much better choice compared to regular white flour tortillas Prevention.com). Depending on the size tortillas you get will change the number of burritos you will make. Shown in the picture above is a small 8" and 5 eggs made 5 burritos. With lots of vegetable and meat mixed in, only one egg is needed in a small wrap but bigger wraps will fit more. 

         Another great thing about these is that you can make extra, wrap them up and stick them in the fridge and all you need to do is reheat them to eat, using stovetop, a grill or even a zap in the mircowave. They still are really good leftover! We saved two and heated them on the George Forman the next day and they were just as delicious.


Simple Breakfast Burritos 
Ingredients for 3:
Approx 3, 8" wraps
3 eggs
1 tbsp milk
1/3 cup chopped bell peppers - red and/or green
1/4 cup chopped onion
garlic powder
onion powder
cayenne pepper (approx 1/4 tsp)
1/3 cup shredded cheese
3 pieces bacon
3 small breakfast sausages
salt and pepper to taste
Hot sauce to serve

Directions:
Cook bacon and sausage over medium heat until crisp, remove and drain on paper towel. Remove fat from pan, except for a couple teaspoons. Add peppers and onion to pan and cook, stirring for 2-3 minutes. Crumble bacon and sausage and add back to pan with vegetables, scramble eggs in bowl with milk and seasonings and add to pan, moving with spatula until just cooked. Sprinkle cheese on wraps and top with egg mixture. Fold in right and left sides a bit to prevent filling from oozing out, pull the bottom to the top, tuck in the insides and roll the burrito. Grill burritos on George Forman style grill or just cook on the stove, pressing down the top of the burrito until they are crisp. 


Tuesday, April 23, 2013

Slow Cooker Honey Sesame Chicken w/ Roasted Sugar Snap Peas


       I can usually judge the goodness of a meal by how excited I am to blog about it, and for this one I just couldn't wait! It was definitely one of the tastiest dishes I've made in a while and it has me looking for other recipes with similar flavors. It was spicy and sweet, and roasting the sugar snap peas was a perfect side (I can't believe I had never tried that before). Also, it was all so simple to prepare. Gotta love that crock pot, doing all the work for you, and with some damn good results!


          With finals coming up, this is a great recipe to use - or any crock pot recipes for that matter - because you can get it out of the way easy just throwing things in the pot, take a study break when it's done, whip up a side or two and dinner is served quick! Then maybe pair the leftovers with a nice big glass of wine or two, screw it by the end of this week maybe the whole bottle! ;) I know I plan on rewarding myself for all my studying!!

          Like my Coconut Chicken Curry, I used chicken thighs because they break down great in the slow cooker and become super tender, but you could use chicken breasts as well (they are healthier for you). I also made a sauce to dip the peas in which I found unnecessary for this particular meal because the sauce with the chicken worked great, especially in one bite incorporating it all. For a different recipe, I definitely recommend the sauce because it was delicious! It would be a great healthy snack, as well.


Slow Cooker Honey Sesame Chicken
Directions:
Approx 2 lbs chicken thighs (or breasts)
1/2 tsp pepper
1 tbsp garlic, minced
1/3 cup low sodium soy sauce
1/4 cup honey
1/4 cup tomato paste*
3 tbsp rice vinegar
1/2 tsp ground ginger
1 tbsp water
2 tsp sesame oil
1 tsp onion powder
1/4-1/2 tsp crushed red pepper (optional - for spice)
2 1/2 tsp cornstarch
1/4 cup water

*you can substitute 1/4 cup ketchup for the tomato paste, and if you do then use 1-2 tbsp rice vinegar

Directions:
Cut all fat off chicken, season with pepper and place in crock pot. Wisk together the rest of the ingredients except the cornstarch and 1/4 cup water. Pour mixture over chicken, and cook on low setting for 2-3 hours (check at 2) or until chicken is cooked through and tender. Remove chicken from liquid and put on cutting board. Wisk together cornstarch and water and mix into liquid in crock pot. Change heat setting to high. While liquid is thickening, shred chicken with two forks, and once liquid has thickened, turn off crock pot and add chicken back and mix. Serve with brown rice or quinoa and roasted sugar snap peas - recipe follows. 


Roasted Sugar Snap Peas
Ingredients:
Approx 1/2 lb sugar snap peas
1 tbsp olive oil
1/2 tsp salt
1/2 tsp pepper
1/2 tsp garlic powder

For dipping sauce:
1 tbsp rice vinegar
2 tsp honey or pure maple syrup
1 1/2 tsp sesame oil
2 tsp reduce sodium soy sauce
dash of ginger
pinch cayenne pepper (optional for heat)

Directions:
Preheat oven to 450 degrees. Wisk together all sauce ingredients and set aside. Toss peas in olive oil and season with salt, pepper and garlic powder. Roast for 6 minutes, flip over and roast another 4-5 or until they've browned a bit. Serve with sauce

(Note the fork sneaking in the picture, we just couldn't wait!)

Saturday, April 20, 2013

Roasted Banana Scones


       Bananas have really grown on me in the past few months.....well banana flavor, like mashed up bananas in baked goods or smoothies etc. I still haven't gotten into eating them whole and plain, the texture is weird and just freaks me out, and just.....no. But some roasted banana scones, now that is more my kinda thing. Especially with some yummy brown sugar glaze drizzled on top! Look at this picture and tell me you disagree...


         Health isn't really the main priority of these sweet little treats (especially if you smother them in glaze), but they aren't too bad for you in the spectrum of baked goods. There is only 4 tbsp butter and you can use greek yogurt (fat free) instead of regular yogurt for extra protein! So feel free to eat them occasionally for breakfast, or dessert! 


Start by roasting the bananas to bring out their sweetness and give good texture for baking:
Pretty, right?
Mix up the dough, fold in some nuts
Press it to the shape of a large disc, about 1 1/2 inch thick (preferably on wax paper but we didnt have any) and freeze to set
Cut into pieces, with an optional sprinkle of crumb topping
Bake!
And drizzle with sweet, delicious, brown sugar glaze
Voilà!


Roasted Banana Scones
3 bananas
2 tbsp milk
1/2 cup yogurt (greek or regular)
2 1/2 cups flour (optional use 1 1/2 cup regular, 1 cup whole wheat)
3 tbsp brown sugar
2 tbsp white sugar
2 tsp baking powder
1 heaping tsp cinnamon
1/2 tsp salt
4 tbsp butter
1/3 cup walnuts, chopped

Glaze:
1 tbsp butter
2 tbsp milk
3 tbsp brown sugar
1/2 tsp vanilla
1/3 cup powdered sugar

Optional Crumb Topping:
1/4 cup brown sugar
2 tbsp flour
2 tbsp butter
1/2 tsp cinnamon


Directions:
Preheat oven to 350 degrees
Roast unpeeled banana on rimmed baking sheet for 15 minutes, they will be completely brown like shown in picture. Remove from oven. While bananas cool, mix together flour, sugars, baking powder, salt and cinnamon. Cut in the butter to the flour mixture. Peel and mash bananas, mix with milk and yogurt. Stir banana mixture into flour mixture until just incorporated. Fold in walnuts. 
Press dough into the shape of a disc, about 1 1/2 inch thick on a pan or plate lined with wax paper (for easy removal) and put in freezer, this will make it easier to cut later on. Preheat oven to 400 degrees and make the crumb topping my mixing together all ingredients. Remove dough from freezer, top with crumb topping (optional), and cut scones into 8 pieces and bake in preheated oven for 30-35 minutes. 
While scones cool, make glaze by microwaving butter and milk for 15-20 seconds or until melted. Combine all ingredients together. Wait to top scones until they have cooled.

Recipe slightly adapted from soupaddict.com


Wednesday, April 17, 2013

Slow Cooker Chicken Coconut Curry- w/ lots of veggies!


      I haven't worked much with curry and I was thinking it's about time to try; I'm always looking to broaden my culinary horizons, and I do love curry (and Indian style foods - definitely more recipes like this to come!). I thought a good slow cooked meal would be great for a monday, so I could get it all in the crock pot early and not worry about it until it was dinner time. It turned out soooo delicious. It has a good amount of spice but it mixes well with the sweet coconut milk and tomato paste. It's packed with vegetables giving it some good nutritional value and instead of serving it over rice, we put it over quinoa - much healthier.


       I'm in this habit of putting foods that generally go over rice on quinoa instead. It adds more flavor and is much better for you. It really is a great substitute. (check out - Beef and Broccoli w/ Quinoa or Chicken Marsala)


        I don't know what more a college kid could ask for - a budget friendly, one pot (no mess), hot and spicy, flavorful dish that is simple to make and there are leftovers for days. After two people having two decent sized servings, plus seconds, we had this tupperware leftover which is more than enough for at least three more meals. (The picture doesn't do it justice. It was 4 cups at the least!) I'd say the total recipe serves 5, those being large servings.


Slow Cooker Chicken Coconut Curry

Ingredients:
1 lb chicken thighs
1/2 tsp onion powder
1/2 green bell pepper, chopped
1 red bell pepper, chopped
1 medium onion, chopped
2 potatoes, peeled and chopped
4 carrots, peeled and chopped
1 1/2 tbsp curry powder
1 tbsp garam masala
1/2-1 tsp salt
2 tsp minced garlic
1 1/2 cups coconut milk (light or regular)
1 can tomato paste
1/2-1 tsp crushed red pepper
2 tbsp water
1 tbsp cornstarch

Directions:
Cut chicken into bite sized pieces, removing any large piece of fat (no need to get too picky about it) and season with onion powder and a few shakes of pepper. Add Chicken, carrots, peppers, onion and potatoes into crock pot. In medium bowl, mix together curry powder, garam masala, salt, garlic, coconut milk, tomato paste, red pepper and water. Pour mixture over chicken and vegetables and cook on low for about 5 hours or until vegetables are tender and chicken is cooked through. It will be bubbling at this point, add the cornstarch and stir and turn off heat or keep on a warming setting. It will thicken. Serve over quinoa or brown rice.


Open Faced Smoked Salmon Sandwich w/ Guacamole


        I love smoked salmon, but I usually only have it as an appetizer (example recipe link: Smoked Salmon Crostini) and I haven't really gotten all too creative with it otherwise, but that is all about to change. It has such great flavor and it doesn't need to be cooked so it's really simple! Right out of the package and straight into my mouth - or on top of toasted focaccia with cream cheese and guacamole, sprinkled with pepper and dill. It was absurd. Like too good for words to even explain - I think I'm in love with a sandwich. The bakery fresh, herb packed, toasted focaccia is probably what did me in...
 Just look at it...... *drool*


       It's such a simple sandwich that's still insanely delicious and flavorful, and it can be served for breakfast, lunch or dinner. You gotta agree that one of these would be a hell of a good start to a day. (I bet it'd work great on a bagel!) 2 oz of smoked salmon on top of this sandwich provides over 13 grams of protein, heart-healthy omega-3 fatty acids and vitamin B12, and the avocado packs in vitamin C, fiber and healthy fats - and together it's the perfect match. It's creamy and crunchy and nutty and salty and the fresh dill just ties it all together into one incredible bite. Good lord it's delicious. 


         Feta cheese is another great (optional) way to top the sandwich....because you know how I obsess over feta (eat it by the handful, put it on everything), but don't leave out the dill! Maybe I obsess over dill a little bit too, but I swear it makes it 10x better. 


        This sandwich will also work on any bread - go for a whole wheat, multigrain or oatmeal sandwich bread if you're trying to be healthy. Fresh bakery bread is probably the most delicious (and expensive) option if you're looking to treat yourself, but we all know, poor college kids can't always be blowing our money on fresh baked goods - we have to save it for more important things....like new summer clothes and things we tend to drink on the weekends ;) 


Open Faced Smoked Salmon Sandwich w/ Guacamole
For 2 Sandwiches
Ingredients:
2 pieces bread
1 avocado
1/4 tsp garlic powder (or just a few shakes)
1/4 tsp onion powder
1/4 tsp pepper
1/2 tsp cumin
2 tsp lemon juice
4 oz smoked salmon
cream cheese
1 tbsp fresh dill, chopped
salt and pepper to taste

Directions:
Toast bread in toaster or preheat oven to 350 and toast for 5-10 minutes. While toasting, cut avocado in half, remove pit, scoop out insides and mash with fork in small bowl. Mix in garlic powder, onion powder, pepper, cumin and lemon juice. Taste test and add more or less seasoning - bigger avocados may need more seasoning. Once bread is done toasting, spread with desired amount of cream cheese and then spread guacamole. Top each sandwich with about 2 oz of salmon. Season with salt and pepper and sprinkle dill.


Monday, April 15, 2013

Browned Honey Butter Pork Tenderloin


       If you're looking to indulge yourself in a delicious dinner, this is the way to do it. Pork tenderloins rubbed with cajun spices, browned in honey butter, then baked to juicy perfection, soaking up all the sweetness. Oh, it's good.


        It's tender and juicy and moist and sweet and yummy and MmmMmmm...especially with a few spoonfuls of the remaining sauce. There isn't much that's better than a browned butter sauce (There are healthier things, but we'll ignore that. For now, you treat yourself!) and pork goes so well with something sweet. It's definitely one of my favorite pork tenderloins I've ever eaten and it was quite simple.

        I served it with some rosemary couscous and baked sweet potato fries; kind of an odd combination, but we make the best of it and work with what we have in this little pathetic excuse for a kitchen! That's what college cooking is all about :)


Browned Honey Butter Pork Tenderloin
Ingredients:
1 1/2 lbs pork tenderloin (2, 3/4-1 lb each)
1 tbsp cajun seasoning
1/4-1/2 tsp cayenne pepper (optional)
1 tsp pepper
4 tbsp butter
3 tbsp honey
1/3 cup warm water

Directions:
Preheat oven to 375.
Rub pork with pepper and cajun seasonings and set aside. Heat butter and honey in large pan (if you have oven proof pan use that and don't transfer pork and sauce to baking dish in later steps) over stove on medium heat until melted, and add pork. Brown for 5 minutes, then turn over and cook another 5 minutes on the other side. Place pork in baking dish and pour sauce from pan on top (or keep in same pan if it's oven proof). Bake in preheated oven for 15-20 minutes or until internal temp reaches 145 degrees. 
*Be careful not to let it over cook because pork easily becomes tough!


I made only very slight changes from the original recipe I found on Momma Hen's Kitchen


Saturday, April 13, 2013

Spinach Breakfast Pizza


       It's safe to say that I will never get sick of breakfast pizza. When I make it I find myself more than willing to eat it leftover.......for all meals of the day. It's just so good. I made one recently that is pretty similar to the original breakfast pizza recipe I posted, but this time I included spinach wilted with garlic and it made a world of difference.


        Seriously, it doesn't get much better than this. Most breakfast pizza recipes I've come across use unrolled crescent dough as the crust, and I have tried that way as well, and it's good, but it just isn't the same. When I make a breakfast pizza, I want a pizzzza....and this is perfect. The crust is crunchy on the outside but soft in the center, the eggs are fluffy and marbled with cheese with the sweet maple flavor of the sausage and bacon.....Mmmmmm not to mention the crunch of onion and peppers. 

         What makes it 10x better is the fact that it's so cheap. Eggs are the world's gift to college kids, I swear. Actually, eggs and spinach are the world's gift to college kids - such a great combination. I often scramble an egg and garlic with a big handful of spinach and pile it between two pieces of whole wheat toast with hot sauce for breakfast, but I'll blog more about that another time :)

        Not gonna lie, as I write this in the library (homework, shmomework) my mouth is watering in memory of eating this. I wish I made it today and not last week so it would be waiting for me in the fridge....WHYYYYY


        I'm seriously having withdrawals.....but now I know, from now on I should blog about delicious foods while I still have them leftover so I don't have to suffer their absence. Especially in the library....


Spinach Breakfast Pizza
Ingredients:
1 premade pizza dough (portland pie co!)
1-2 tbsp cornmeal
2 tsp garlic powder - optional for crust
1 tbsp olive oil - optional for crust
6 oz bag fresh spinach
2 tsp minced garlic
1 cup cheddar cheese
6-7 eggs
4 pieces maple bacon
1/2 lb maple sausage
1 medium onion, chopped
1/2 green/red bell pepper, chopped
 1/2 tsp garlic powder
1/2 tsp onion powder
salt and pepper to taste
Hot sauce/Ketchup to serve for dip

Directions:
Preheat oven to 400 degrees
Cook bacon and sausage over medium-high heat in pan over stove. Remove and drain, cut into small pieces. Remove some of the fat from the pan, leaving about a tbsp and cook the bell pepper and onion with minced garlic over medium heat. 
After about two minutes, add spinach and stir to wilt. Once wilted (after 2-3 minutes) remove pan from heat and set aside. 
Scramble eggs in a medium bowl and season with garlic powder and onion powder. 
Lightly spray a pizza stone or baking sheet (baking sheet with raised sides recommended so egg mixture doesn't run off pan) and sprinkle with cornmeal. Stretch dough and fit onto pan, pressing fingertips around outside to make crust. 
Brush crust with tbsp olive oil and sprinkle with 2 tsp garlic powder.
 Layer on the sausage, bacon and vegetables, then top with cheese. Carefully pour egg mixture over top (it wont look like much but they fluff up when it cooks) and bake in preheated oven for 20-25 minutes or until eggs are set and crust is browned.


Thursday, April 11, 2013

The Perfect Blueberry Muffin


    I love baked goods, especially muffins, so after reading rave reviews on the To Die For Blueberry Muffin Recipe found on allrecipes.com, I had to try it. I sorted through the written reviews and recommendations and followed the ones I thought were best and made some changes of my own. It is, in all honesty, the BEST homemade blueberry muffin I've ever had. The crumb topping was crunchy and sugary and sweet and the consistency was perfectly moist. After my first bite I literally said out loud "oh my god...." We ate three right when they came out of the oven.

I'm in blueberry heaven.....


       I'll continue to be in blueberry heaven when I eat another one of these later tonight, and probably again when I make another batch next week....I'm in love. It's the crumb topping that really sets it apart from all the others, so sweet and sugary crispy crunchy; the ideal muffin top. 


(As you see some were snatched before I could even take a picture! We were too anxious because they smell absolutely fantastic while baking)

        I altered the recipe a bit, using 1/2 cup whole wheat flour (my mom has rubbed off on me more than I thought) because I'm determined to add it to every baked good recipe that I try, and you really can't tell the difference. I also used frozen blueberries instead of fresh (saving some money here!), and it still came out great, soooooo great - like I seriously plan on using this recipe for the rest of my life....that great. As I'm trying to write this my eyes keep getting glued onto the picture of it, all warm and fresh from the pan, a little piece of baked perfection and my mouth is watering and ugh I'm getting so distracted by the memory of it's deliciousness!
        I bet it would be delicious using chocolate chips as well, though I do already have my recipe for Chocolate Chip Muffins w/ Whole Wheat Flour and Wheat Germ. We'll see, maybe I'll switch it up sometime, but for now I'll just continue to drool over these ones. 


       Trust me, and go preheat your oven, get some ingredients out, get baking and I swear you'll thank me later....


Perfected Blueberry Muffins
Makes 8/9 large bakery style muffins or 12 regular
Ingredients:
1 cup all purpose flour
1/2 cup whole wheat flour
3/4 cup sugar
1/2 tsp salt
2 tsp baking powder
1/3 cup vegetable oil
1 egg
1/3 cup milk
1/2 tsp vanilla
1 cup blueberries - or more
1/2 cup brown sugar
1/3 cup flour
1/4 cup butter, cubed small
2 tsp cinnamon

Directions:
Preheat oven to 400 degrees
Combine flour, sugar, salt and baking powder in medium bowl. In separate bowl combine vegetable oil, egg, milk and vanilla. Make a well in the dry ingredients and pour in egg mixture. Mix until just combined, DO NOT OVER MIX! Fold in blueberries. Grease muffin tins and scoop in batter all the way to the top of the cup for large muffins, or 2/3 for regular sized. Mix together brown sugar, flour, butter and cinnamon with fork and sprinkle on muffins, making sure to get some butter on each (you don't have to use all of the mixture, I had some leftover). Bake in preheated oven, large muffins 20-25 minutes and smaller ones about 18 minutes, or until toothpick comes out clean.


Monday, April 8, 2013

Rosemary Drumsticks with Roasted Root Vegetables


        This is yet another recipe inspired by my mom's cooking. She always roasts root veggies - potatoes, sweet potatoes, carrots, and onions, tossed in olive oil and seasoned with garlic and rosemary. They are so delicious and I snack on them all the time when they're in the fridge. They go especially good with a pork roast, but for budget reasons, I decided to use those same ingredients and flavors and use chicken drumsticks instead, because as I mentioned in my Baked BBQ Chicken Drumsticks recipe, they are so cheap - often .99 cents a pound! It cost 4.25 to get 12 drumsticks....I'd say thats quite a deal! The meat is always moist and tender and the skin crisps up really nicely. Paired with a whole mess of vegetables, it's filling and nutritious, and of course super tasty!


         I will probably experiment more with chicken drumstick recipes. There are so many options and it can be prepared so cheaply yet still be delicious meal. Perfect for a hungry college kid :)

         This recipe is great because potatoes are also cheap and always in my kitchen, and it's made easy by just tossing in some baby carrots, which are often in my fridge as well. 


Rosemary Drumsticks w/ Roasted Root Veggies
Ingredients:
6 chicken drumsticks
3 cloves garlic, minced
2 tbsp rosemary, divided
2 tbsp olive oil, divided
1 tsp garlic powder
1/2 tsp onion powder
1 large sweet potato
2-3 medium potatoes (preferably red)
Approx 1 cup baby carrots
1 medium onion
salt and pepper to taste

Directions:
Preheat oven to 375 degrees.
Peel and chop potatoes into bite sized pieces - if using red potatoes, don't remove skin and chop onion. Pat baby carrots dry and put all veggies in a bowl. Toss with 1 tbsp of olive oil, 1 tbsp rosemary, minced garlic and season with salt and pepper. Pat chicken drumsticks dry (this is important because it allows the skin to get crispy) Brush them with the remaining tbsp of olive oil and season with tbsp rosemary, garlic powder, onion powder and salt and pepper to taste. Spread only veggies on large baking dish - try not to stack veggies, I had to because we were lacking more pans, but they crisp up better if you dont - and bake in preheated oven for about 15 minutes, then remove from oven and add drumsticks. Cook for fifteen minutes, turn drumsticks and bake for another 20 minutes or so.


Sunday, April 7, 2013

Perfect Spring Dessert: Hummingbird Cake


        I wasn't able to make it home for Easter this year which was a bummer, but we made the most of it up at school, starting off the day going to the Bog Walk which was so pretty and got us out in the fresh air for some exercise before some serious eating.


      Of course I prepared a meal of my own - not quite as good as a big dinner with my family, but it had to do. For dessert I made a Hummingbird cake, which I had never made, or even really heard of, and it was seriously one of the greatest cakes I've ever eaten. It has flavors similar to carrot cake, but also resembles a banana bread, and it is just perfect.


        It was so sweet and moist yet there was a real depth of flavor from the cinnamon, brown sugar and ginger. Of course with a homemade cream cheese frosting on top, there will seriously never be any competition for future Easter cakes - or any other holiday for that matter, this just might always be my go-to from now on. Many of my friends at school tried it and I didn't get a single bad review (or anything less than an awesome review for that matter), they all seriously loved it.

          Someday I will have to try tweaking my recipe to make it a little bit healthier so I can eat it more often (like breakfast, lunch, screw it maybe even dinner) but for holiday purposes, I like to just try and neglect calories and nutrition facts. It's Easter, come on! At least there are some fruit and nuts in the cake ;)

          I made a sheet cake in a 9x13 inch pan, but you could use two 8" round pans as well. I found this to be easier and I didn't have too much time to spare!


Hummingbird Cake
Ingredients:
2 3/4 cups all purpose flour
1 cup chopped pecans or walnuts
3 ripe bananas*
1/2 cup finely chopped pineapple (fresh is best)
1 heaping tsp ground cinnamon
1/2 tsp nutmeg
1/2 tsp ginger
1 1/4 tsp baking soda
1/2 tsp salt
3 eggs, room temperature
1 cup sugar
3/4 cup brown sugar
1 cup vegetable oil

Directions:
Preheat oven to 350 degrees.
In a medium bowl, mix together bananas, pineapple, walnuts or pecans and 1/2 cup of flour. This should make a pretty thick batter, and the bananas should all be mushed, not chunks of bananas. This is easier the riper the banana. Mix the rest of the flour, cinnamon, nutmeg, ginger, baking soda and salt in a large bowl. In a separate bowl, beat together the sugar and the eggs at medium speed until light and thick - about 3 minutes, then gradually beat in the vegetable oil. Mix egg mixture with dry ingredients until combined and then gently fold in the banana mixture. Grease a 9x13 inch pan, or two 8" rounds and bake in preheated oven 40-45 minutes in 9x13, 35 minutes in 8" rounds - or until cakes are firm and toothpick comes out clean. 

*The riper the banana the better - they are way sweeter, and much softer to they mix really well. So don't be freaked out if they are fully brown, they will work great - its better that way!


Cream Cheese Frosting
Ingredients:
2 (8 oz) packages cream cheese, softened
1/2 cup butter, softened
2 cups powdered sugar
1 tsp vanilla

Directions:
In medium bowl, cream together cream cheese and butter until smooth. Mix in the vanilla and then gradually add the powdered sugar. Store in the fridge 

*If making a 9x13 inch cake, you won't need the entire batch of frosting, there will be a little extra!