Friday, January 10, 2014

Juicy, Healthy and Gluten Free Meatloaf w/ Flaxseed


     I loooooooove myself a good meatloaf, and anyone who claims they don't like it has never really tried it and just has that childish connotation that its the mystery meat in the cafeteria. I can agree, a loaf of meat doesn't sound like the most eye appealing dish in the world, but when you know how moist and tender and flavorful and oh-so-delicious it is, it starts to look pretty damn good.
     Recently we made one from a recipe from the Wheat Belly book and it was amazing. So tender and juicy, the flavor was great and it was healthier than your average one, because instead of using breadcrumbs, it called for healthy ground flaxseed, and of course we used lean ground beef.


         Featured above is my brother's plate where the meat to vegetable ratio is always slightly off balance, but being an active 17 year old boy, I think its ok. Especially when the meat is this delicious....... Jeeeez I wish we had leftovers!
         Honestly it was one of the best meatloafs that I've ever had, so I'm not missing the gluten too much yet! If these are the type of meals I'm eating, I am totally fine with that!

Recipe from WheatBelly Cookbook


Tuesday, January 7, 2014

Cauliflower Pizza and A Potential Change of Focus


     So the purpose of my blog in the first place was to post college friendly recipes - meaning cheap, healthy, and fairly easy/quick, but I think I might have to throw in another spin on that. I've had quite a bit of health and digestive problems my whole life, and medication and eating pretty healthy doesn't seem to change that, so my mom and I have both decided to try out of gluten free diet, thanks to some research, some public television presentations, advice from doctors and a book called Wheat Belly.

(Shown below is the Wheat Belly Cookbook, not the actual Wheat Belly book that goes more in depth about the side affects and health problems associated with consuming wheat. The book talks about just omitting wheat, but we've decided to just go all out gluten free, which includes wheat, rye and barley )
       
        This book goes through all the symptoms of someone who is really affected by ingesting wheat, and how excluding it from your diet can make some remarkable changes. So with fingers crossed my mom and I are going to embark on this gluten free (and potentially frustrating and annoying - but we'll deal with it) journey, and I'll see what recipes I can come up with and post on here. If all goes as planned and I notice a big difference in how I feel from avoiding all that is wheat/gluten, then I will change the focus of my blog to college cooking for the "glutards", as it's called.
       I had seen many recipes for a cauliflower crust pizza during my food-gawking-blog-searching internet escapades, and I figured that would be a good start. I mean it's pizza! So maybe I wouldn't feel so upset leaving behind my yummy whole wheat bread and easy frozen pizzas and pasta and all that is breaded and fried....if my first gluten free meal was a delicious pizza that didn't taste all so gluten free. And it didn't!
      Now it doesn't have the same doughy consistency of a normal pizza so if you just get that thought in your head it'll be an easier transition (not that its a bad consistency at all, I really liked it). It does have very similar flavor, if not better because the cauliflower is seasoned with dried herbs and garlic powder, so it tastes delicious.


       Even if you aren't gluten free/wheat free, this is a good option for a low carb, low calorie pizza substitute that is still just as delicious. It does take some more work than just throwing some sauce on a precooked dough, but to make it easier you can make them and bake them ahead of time and store them in the freezer for easier use on a busier night. So no excuses! (Though I'm sure I'll try to find some for myself during the next few beginning weeks of getting used to this way of eating....)

      After microwaving the cauliflower as it says in the directions, really make sure to ring out all of the moisture that you possibly can, so it doesn't end up steaming in there and it crisps up nicely!


Cauliflower Crust Pizza- GF


Monday, December 30, 2013

Leftover Turkey Chili for Tailgating


         My Dad brought my boyfriend, my brother and I to the last Patriots game of the regular season vs. Buffalo. It was like 38 degrees and raining pretty hard, so not the best of weather conditions, but it sure did make for an exciting game! We were very lucky that our seats were covered from the rain and the wind was blowing in our favor so we managed to stay dry for the majority of the game, which I was extremely thankful for because the people just two rows ahead of us were getting drenched!
       

          There's no way my Dad would be going to a Pats game without a solid tailgating session, so of course we hung out under a tent, grilled some burgers (Omaha steak burgers to be exact) and drank a couple beers, surrounded by thousands of other fans. I don't know of a better way to spend a Sunday.....even if it was raining!

        If you are going to be outside tailgating in some cold weather, it only makes sense to come prepared with a yummy pot of chili, and it heats up quite well on the grill. The warmth and spice of a nice big bowl will keep you not only warm, but very satisfied!
        A day or two before the game my mom had cooked up a turkey, so I decided that would be the meat component of the chili, which ended up being a great choice and it was extremely simple. I added a mix of dark and white meat, beans, and loaded it with veggies, just as my mom would. 


          When I make chili I usually just add spices as I go and season it to taste. Sometimes I use a chili seasoning packet, then add in some extra cumin because I love that smokey flavor, and some cayenne pepper if I'm in the mood for some heat. This recipe is very general, and you can add other spices or try a seasoning packet if you prefer!


Leftover Turkey Chili
Ingredients:
2 cloves garlic, minced
2 small/1 large onion, chopped
1 bell pepper, chopped
Approximately 5 cups leftover turkey, chopped
1 1/2-2 tbsp cumin
1 1/2-2 tbsp chili powder
1/4-1/2 tsp cayenne pepper, or to taste
Salt to taste
1 can corn, drained
28 oz can petite diced tomatoes
16 oz jar of salsa
1 can black beans, drained and rinsed
1 1/2 cups chicken broth

Directions:
Add about a tablespoon of olive oil to a large pot over medium heat, and add in garlic, onion and bell pepper. Stir constantly, and after a few minutes add in turkey meat and the spices and stir. 
Add in remaining ingredients and mix it up well. 
(Taste test in case you need to altar spices to your preference! But be aware it will get spicier as it sits and you reheat it later)
Reduce heat and let simmer for about ten minutes.


Enjoy tailgating, Go Patriots!
(And also ignore my brother's face below he is weird.....)


Monday, December 16, 2013

Simple & Delicious BBQ Steak Marinade


      One of my favorite things to eat is a nice, juicy marinated steak tip. I'm always trying different marinades and mixing up ingredients, but I often come back to this same simple recipe because it's so delicious. I love the taste of my favorite bbq sauce, with some added zing from the italian dressing, and the worcestershire that really brings out the meaty deliciousness of the steak. It's super easy and the ingredients can always be found in my fridge.


       Five out of the 9 months I'm at school it's way too cold outside to use the grill at my boyfriend's house, and plus I'm pretty lazy to begin with, so I cook my steak in the oven on broil to get a similar outcome. I highly recommend doing that over pan searing or baking at a lower temperature.

     Some tips- Don't broil the meat smothered in the marinade, because the oil in it sears the meat quicker, and plus it will all drip off and end up burning. Also don't season it with salt and pepper because the salt slows the browning process and the pepper will burn.


Simple BBQ Steak Marinade
Ingredients:
1 1/2 lbs steak tips
1/4 cup worcestershire sauce
1/2 cup your favorite bbq sauce
1/2 cup italian dressing
1 tsp garlic powder
1 tsp balsamic vinegar (optional)

Directions:
Mix ingredients in medium bowl, add steak and cover.
Marinate in refrigerator for 3 hours (but at minimal 1).
Remove from marinade before cooking and allow meat to come to room temperature before broiling or grilling to desired doneness. Discard marinade


Sunday, December 8, 2013

Brown Bag Popcorn


       Until recently I had been eating microwave popcorn as a late night snack, thinking that a non-buttered, lightly salted bag is a healthier, low calorie substitute of chips or crackers. I came across an article on yahoo, "The 7 Foods Experts Won't Eat" which explained how microwave popcorn has harmful chemicals that caused cancer in animals during testing. The chemicals are in the lining of the bag, but when heated, they vaporize and make their way into the popcorn which you eat. Manufacturers have promised to phase out the chemical by 2015, but the bags being sold now until then, and the ones in your cabinet, still contain these chemicals.
       In order to avoid these harmful chemicals, I use an idea that my mom gave me. You could use a popcorn maker, or do it on the stove top, but if you're looking to save some effort and stick to the microwave, this is a great way to do it.


       You can still salt it, season it, and maybe even add some melted butter, and it's going to be way healthier than the bag stuff. And it's nearly just as easy!


      So save yourself from the harmful chemicals of bagged popcorn and also save a bunch of money! Bagged popcorn is way over priced (around 3.50 per pound) and you can make it the brown paper bag way for about 1/7th of the cost! That's some college living if you ask me!

       Try mixing up your topping choices, with some parmesan cheese, or a little bit of cinnamon & sugar, some cumin and chili powder, etc etc!


Brown Bag Popcorn
Ingredients:
Heaping 1/3 cup popcorn kernels
2 tsp olive oil
Salt & seasonings to taste
Melted butter (optional)


Directions:
Mix kernels and olive oil in small bowl. 
Dump into large brown paper lunch bag. Fold the top down and over again, and put in the microwave for about 3 minutes (depending on the power of your microwave) or until the popping slows to 1 pop or so per second. 
Season with salt/seasonings and melted butter if desired.


Tuesday, December 3, 2013

Sweet Potato Casserole


        Some sweet potato casseroles, topped with marshmallows and loaded with butter and sugar, could easily be substituted for a dessert. Although they're good, they're far too sweet for me, which is why I am very happy with this recipe. It's sweet enough to make it a special seasonal treat, but not so sweet that you feel like it's candy. It brings out the delicious flavor of the potatoes without overpowering them with sugar.
        It was one of soooo many side dishes at our Thanksgiving dinner at my aunt's house. We had all our family's staple sides, a cheesy potato dish topped with cornflakes my cousin makes, my aunt's clam chowder, some creamed pearl onions that were new to the table that were outstanding, green bean casserole, squash, sweet potatoes, regular potatoes, two kinds of stuffing, etc, etc. We cooked two 18+ pound turkeys to feed us all!

Here's a picture of my cousins on my mom's side of the family (not included the ones married in) and my Grammy. For the first time in a while, all of the cousins were able to make it and be together!


     This casserole would of course work very well with your Christmas dinner too, whether it be a ham or a roast. My family is a little less traditional and we order in an absurd amount of Chinese food, so I doubt I'll be making the sweet potato casserole to go alongside pork fried rice....


       I realized halfway through dinner that I hadn't taken a good blog photo of the baked product, so being the nerd I am I had to get up and take one. It was over half gone and not looking as crisp as it does straight out of the oven, but I don't think there is a really good way of making a casserole look so pretty in a photo anyways :P
       It tasted absolutely delicious and that's what it really comes down to!


Sweet Potato Casserole
Ingredients:
About 5-6 medium sweet potatoes, peeled and chopped
1/4 cup honey
1 tbsp brown sugar
1 large egg
1 tsp cinnamon
1/4 tsp nutmeg
1/4 tsp ginger
1/2 tsp salt

Topping:
1/2 cup brown sugar
1/3 cup flour
3 tbsp butter, softened
1/2 cup chopped pecans

Directions:
Preheat oven to 350 degrees
Mash sweet potatoes, and combine with honey, 1 tbsp brown sugar, egg and spices. Spread into 1.5-2 quart casserole dish.
To make topping, mix sugar and flour together. Cut in butter until its evenly distributed and mix in pecans.
Bake in preheated oven for 40-45 degrees.


Friday, November 29, 2013

Festive Pumpkin Roll


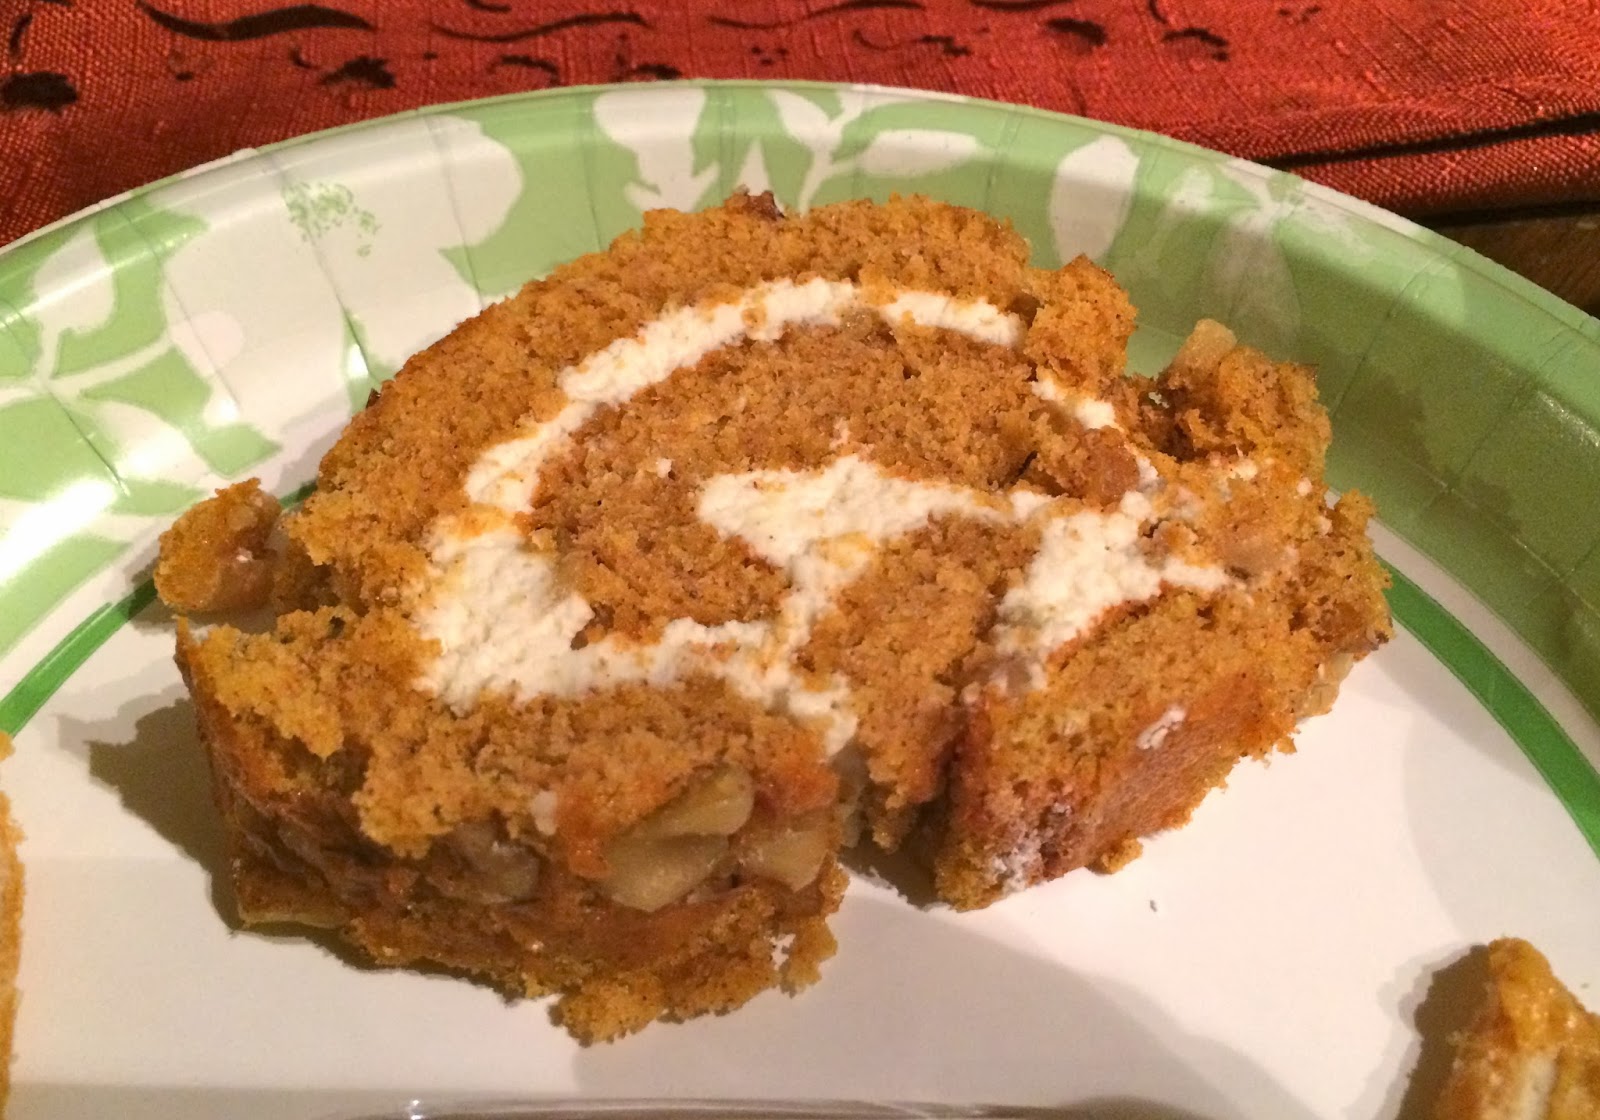
     There is no better flavor that encompasses the Thanksgiving holiday like pumpkin, and my mom's pumpkin roll is a perfect dessert that, to me, is both nostalgic and delicious. Its a little different from your regular bar, cake or cookie, and a it's fun, attractive looking dessert, so that should be enough reason for you to make it!
      I'm not huge on pies, so I'll happily skip straight to this delightful little pinwheel, and then most likely try a little sliver of pie later ;P


        The homemade cream cheese filling really is what makes it so delicious. It's sweet and rich and compliments the pumpkin perfectly, and with the crunch of walnuts......... MmmmMm, I could definitely go for another piece of this right about now!

I'd also like to thank my mom for participating in my step by step photo shoot, in the midst of all the Thanksgiving cooking!


       I hope everyone had a wonderful Thanksgiving, and stay tuned for a wonderful sweet potato casserole recipe that will pair wonderfully with a ham or roast dinner on Christmas!


Festive Pumpkin Cake Roll
Ingredients:
3 eggs
1 cup sugar
2/3 cup pumpin
1 tsp lemon juice
3/4 cup flour
1 tsp baking powder
2 tsp cinnamon
1 tsp ginger
1/2 tsp nutmeg
1/2 tsp salt
1/2 cup chopped nuts
powdered sugar

Filling:
1 cup powdered sugar
8 oz cream cheese, softened
4 tablespoons butter
1/2 tsp vanilla

Directions:
Preheat oven at 375 
Beat eggs on high for 5 minutes, and gradually add in sugar, then stir in pumpkin and lemon juice.
Mix together flour, baking powder, cinnamon, ginger, nutmeg and salt, and then fold into the pumpkin mixture. 
Line a 15"x10"x1" jelly roll pan (cookie sheet with raised sides) with waxed paper and spread with mixture. Top with chopped nuts.
Bake in preheated oven for 15 minutes
*Meanwhile - take a dish towel and spread quite a bit of powdered sugar on it (as shown in photo above). To make the filling, beat ingredients together until smooth.
When roll comes out of oven, flip it onto the towel and roll up starting at the narrow end, rolling cake and towel together, as shown in photo. Let it cool completely in the towel.
Unroll and fill with cream cheese mixture. Re-roll, wrap in saran wrap or foil and refrigerate until serving.


Saturday, November 9, 2013

Momma's Apple Crisp


     Apple crisp is a universally loved dessert, and if you defy that made up fact then I disclude you from my made up statistics. Everyone loves it and if you don't, you are crazy. It's not only the tender, sweet apples with crumbly crisp topping with crunchy oats and brown sugar, but the nostalgia it provides with each bite.

      Fall season and Thanksgiving comfort food always shared with crazy family......Oh the memories!


  Oh that crisp topping looks so yummy!! Especially served warm with a scoop of vanilla ice cream....I seriously don't know what's much better than that.


       This is a recipe of my mom's, and it is so easy. Just sprinkle the apples with cinnamon sugar and top with a brown sugar and oat mixture, and taadaaaaa! Next thing you know you've eaten half your weight in calories, but who cares.
       Just tip back a Shipyard Pumpkinhead and take another bite! It's beautiful autumn in New England and if that's not reason enough to treat yourself, then you need to rethink some things!


Momma's Apple Crisp
Ingredients:
9 apples, peeled and cored
1/4 cup sugar
1/2 teaspoon cinnamon
1/2 tablespoon flour
TOPPING:
3/4 cup brown sugar
3/4 cup quick cooking oats
3/4 cup flour
6 tablespoons butter (melted just 30 seconds in microwave)
1/4 teaspoon baking powder
1/4 teaspoon baking soda

Directions:
Preheat oven to 350 degrees
Mix flour, cinnamon and sugar in a bowl, add in apples and toss to coat
Place apple mixture in bottom of 9x9 pan
Make topping by mixing all the ingredients and sprinkle over apples
Bake in preheated oven for 35-40 minutes or until apples are tender


Friday, November 1, 2013

"Grandma's" Chocolate Chip Cookies


       Halloween as a little kid is exciting, but Halloween as a college student is waaaayyyy better, and the fact that it happened to fall on a Thursday this year was very convenient. I may or may not have made it to my Friday morning classes but the answer to that doesn't necessarily need to be disclosed.....(sorry Mom)
        Needless to say it was an awesome night and everyone came up with some hilarious and creative costumes. Here's what me and my roommates looked like:


       From left to right we have Sam/Wonder Woman, Me/Bingo Nana, Mo/Khaleesi and Maggie/80's prom queen. I'd say it's a pretty awesome array of costumes. My boyfriend was an old person with me, which was pretty hilarious, especially after I stuffed my elastic waistband jeans with a king size sheet for some added butt cushioning. You can imagine I had a lot of fun dancing around with that.....


     So dressing up as a Grandma, I felt it necessary to put my culinary skills to work and make a batch of homemade cookies for all the party goers. (There is a good chance I am about the biggest nerd in the world, but thats okay.) The huge batch of cookies is nearly gone so no one's complaining!


         I found the recipe on Allrecipes. I love that site because the ratings help make it easy to tell what recipes are worth trying, and you can easily read peoples' reviews and suggestions. This particular recipe had great reviews and it was pretty simple so I decided to give it a shot, and it came out really good! They are moist and chewy and sweet, and the dough is dangerously good. Successful recipes always make for a happy blogger :)


Enjoying some homemade cookies and a nice cold Corona! Happy Halloween!


"Grandma's" Chocolate Chip Cookies
Ingredients:
1 cup butter
1 cup sugar
1 cup packed brown sugar
2 eggs
2 tsp vanilla
3 cups all purpose flour
1 tsp baking soda
2 tsp hot water
1/2 tsp salt
2 cups chocolate chips
1 cup chopped walnuts - optional

Directions:
Preheat oven to 350 degrees
Cream together butter and sugars until smooth.
Beat eggs in one at a time and add in vanilla, then baking soda dissolved in the hot water.
Stir in flour and salt then fold in chocolate chips.
Drop by the spoonful onto ungreased cookie sheets and bake for about 10 minutes or until edges are golden